Tuesday, January 7, 2025
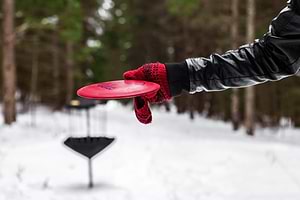
When the temperatures plummet and the snow flies it's not time to hang up your bag it's time for winter…
TOC
Table of Contents
So you got a Permanent Disc Golf Basket and you want to install it into the ground without screwing up the thing you just spent a bunch of money on. Well, you’ve come to the right place. Here at Disc Golf United and Innova Disc Golf, we’ve installed enough permanent baskets to make your head spin. So rest easy, the reading ahead will be well spent.
If you are reading this and you don’t have a permanent disc golf target yet here’s why you should save up and get one. Permanent disc golf baskets are made from hot dipped galvanized steel and other heavy-duty materials that can handle years of play and the full weather spectrum. These are the disc golf baskets that park departments, schools, and disc golf clubs choose when they want a long lasting, championship level target. Anyone, however can get one. If you want the ultimate backyard putting practice basket, this is it.

The permanent targets we use are the PDGA approved Innova DISCatcher Pro 28 Permanent Baskets. We, at Disc Golf United, believe it is the finest target on the market and it’s the same one used for the US Disc Golf Championship. However, if you don’t have an Innova Disc Golf Basket, that’s ok. Many of the steps listed here will be the same for permanent disc golf baskets made by other manufacturers.
After determining your target’s location, use a posthole digger or auger to dig a hole 24 inches and 8-10 inches in diameter. Refrain from creating mud pies and throwing them at each other with this dirt because you’ll use it to fill in around the basket at the end of the project.
Innova’s installation tube is a 24” X 1 15/16″ piece of galvanized steel that houses the DISCatcher pole.
Welded to the top, is a tab with a hole, which will eventually be used to lock the target. Remember this tab because it will come in handy in a moment. **The installation tube is the only piece of Pro 28 DISCatcher equipment that is permanently set into the ground with concrete. This is done so that the actual disc golf basket (pole and all) can be removed when needed. Pretty smart, huh?

This is a simple trick that ensures that concrete will not sneak inside the installation tube – something you really don’t want to happen because it could prevent the disc golf basket’s pole from fully reaching the bottom of the installation tube.

The locking tab should be level with the hole’s opening or 1 inch below. Why? This helps ensure that the disc golf basket is the correct height and so that the installation tube would not be damaged by a lawn mower if the basket was removed. **When positioning the installation tube, make sure there’s enough room to fit a lock into the locking tab.

Innova’s locking collar is a small piece of galvanized steel measuring 3″ X 1 15/16″. It attaches to the bottom third of the DISCatcher Pole. Once the DISCatcher Pole is slid inside the installation tube, the tab of the locking collar will meet with the locking tab of the installation tube so that a lock can be affixed. Seeing the two locking tabs line up will give you great pleasure. It always does for us. The DISCatcher Pole is exactly that. A long pole made from galvanized steel that measures 74″ x 17/8″.
The DISCatcher’s basket (or cage) and the top with chains are both bolted into the DISCatcher pole.

Attach it to the DISCatcher Pole’s bottom three mounting holes using the hardware provided. Hint: the top of the DISCatcher Pole has mounting holes very close to the pole’s end. Don’t use that side. After that, it’s almost time to pour concrete. But before you do …
Have your buddy set the installation tube into the hole as desired and continue to hold it in place as you slide the DISCatcher Pole into the installation tube. Make sure the two locking tabs are lined up. Why put the DISCatcher Pole in now? The reason is twofold: The pole inserted into the tube prevents concrete from getting inside the installation tube during the concrete pour and the pole inside makes it easier to keep things lined up straight.

Now, task your buddy to hold the DISCatcher Pole (still in the installation tube), while you pour the concrete mix into the hole surrounding the DISCatcher Pole and installation tube. Leave a 3-4 inch gap between the ground and the concrete so that you have room for a lock.

Add water to the concrete until you have the ideal mix instructed by the concrete mix bag If your concrete appears too soupy, not to worry, just add more concrete. But not too much! Remember to maintain your 3-4 inch gap from ground level.

Grab your level and place it along the DISCatcher pole at various heights to make sure it is centered. Once it is level, gently remove the DISCatcher Pole from the installation tube.

Wait at least 24 hours for the concrete to dry before installing the DISCatcher Pro 28 Basket into the installation tube. Allow more drying time amid wet weather. You can use this time to assemble your DISCatcher Pro 28 Basket if you haven’t already done so. Hey, at least one step is already done (attaching the locking collar to the pole). Yay! For more on the target’s assembly, go here.
Slide your assembled DISCatcher Pro 28 (pole and all) into the installation tube, and once again match the two locking tabs as you do. Apply your lock of choice. Then shovel the dirt removed from the hole neatly around the base of the target (Remove any excess dirt). Order an ice cream cake and take a picture because you just properly installed a permanent disc golf basket into the ground without screwing it all up.

Personalized Disc Recommendations
Just answer a few questions and we’ll send you personalized recommendations within 24 hours.
GET PRO TIPS